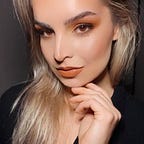
The Crush. Eye Makeup Tutorial ❤

I will happily put my hand up and say that I am a serious makeup addict and enthusiast. There, I said it.. haha!
I like to know the latest trends in makeup, the new ways to ‘apply’ the makeup AND finding affordable dupes of certain cosmetic products.
I have spent top dollar to get certain items… but then wonder if there is a cheaper and more affordable item I can use to substitute the ‘High-end dollar product’.
Luckily, I came across a brand called ‘CrushCosmetics.com.au’ and found a few eyeshadow palettes.
For today’s tutorial, I will be featuring the 35OM eyeshadow palette and the GORGEOUS 35OS eyeshadow palette.
I guess you can say that this tutorial will also be including a little review, too :)
To find out how I achieved this look, just keep scrolling down…
(The recent blog posts, have restricted me from posting too many images. I’ll try to make sure the Step by Step tutorial makes sense to you all)


Step 1: PRIME the lids.
Step 2: NEUTRALISE the eye lid with a skin-toned liquid/cream product.
Step 3: SET the cream/liquid product with a powder. In this tutorial, I used a loose face powder.

Step 4: For our first shade, place this within the crease.
Keep the product along the crease and slightly blend the outer third, upwards towards the tail of our brow.
(From TOP-BOTTOM, Left to Right)
Step 5: Place this shade where you had put the first shade onto. Concentrate this pigment along the outer third.
Start to create the ‘outer-V’, ever so slightly.
(Watch the video above for better understanding :)


Step 6: With the 3 next pigments, start to gradually darken out the middle area of our crease and the outer third.
Remember to have the ‘outer-V’ to be the darkest area.

Step 7: Place the gold-pigmented eye shadow on the inner third of our eye lid.
Slightly exaggarate our inner crease and over-place the eyeshadow.
(Use the video for better reference)

Step 8: Line your lashes with your favourite eye liner.
For this look, I used a gel-based formula.
You can either have a minimal winged liner or you can go for a bolder/thicker line.
Step 9: Mascara TIME!
Coat your lashes with your favourite mascara.
Concentrate the mascara on the TOP lashes.
For the mascara, I used the Benefit Cosmetics’ ‘Roller Lash’.
Step 10: False LASHES!
Find a pair of lashes that’ll showcase not only the thickness of your natural lashes, but also to have the eyeshadow appear through more :)
These lashes are from ‘Glambymanicare’, Miranda Lashes no. 24.

Step 11: With the 2 images given below, first go in with the deep cranberry shade.
Swipe this along the bottom lash line.

Once the product is placed on the bottom lash line, BLEND it.
Step 12: To create a gradual ‘dark to light’ effect, BLEND this shade over the deep cranberry shade.
Step 13: With the 2 shimmer eyeshadows, MIX the two and place this within the inner corner of our eye.

Slightly blend this along the inner area of our BOTTOM lash line.
Also place this shade underneath our brow, focussing the pigment under the ARCH of our brow.
Step 14: APPLY mascara to the bottom lash line.
Step 15: SELFIE TIME


…REVIEW…REVIEW…REVIEW…
COLOUR: 9/10
- 35OM: Great range in tones. Ideal for anyone and for any ocassion. It would be great to see darker matte shades.
- 35OS: Beautiful range in shimmer eyeshadows.
PIGMENT: 9/10
- 35OM: Good pigmentation. Have to apply a few swatches for the darker eyeshadows. They didn’t show up as nicely as the lighter and medium pigments.
- 35OS: AMAZING!! Ideal to use your finger tips to place the shimmer pigments on the lid.
- (if you were to use a brush for the 35OS palette, use a setting spray. This’ll intensify the shimmery eyeshadow’s).
AFFORDIBILITY: 10/10
I would highly recommend this brand to anyone. Great pricing. A big variety in colour choices.
COVERAGE: 9/10
- 35OM: The lighter shades and the medium shades are easier for one easy coverage swatch. The darker shades need more swatching for a better pay off.
- 35OS: B.E.Autiful! Only thing that would make it a 10/10, is to have the shimmery eyeshadows easily applied with a brush with no need for a liquid spray.
Thank you so much for checking out my latest tutorial.
If you have any questions or would like to know ANYthing makeup or skincare based, feel free to send me a message via my facebook page or Instagram account.
To keep up to date with my latest pic’s and posts, head on over to my other social media platforms:
Facebook: www.facebook.com/nikkicphotography
Instagram: @nikki.c.photography
❤ ❤ ❤