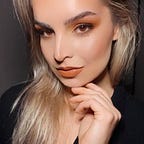
…BLUE Oasis… EYE Makeup TUTORIAL
First off.. let me just say.. I LOOOOOVVVEEEEE the colour, blue.
When I’m at the shops and come across the shade of colour.. I just go….’’WOW’’. When I see this colour throughout social media.. I go… ‘’Oooooo..’’. AND… when I see pictures or drive by the oceanic beaches.. I go ‘Ahhhhhhhh’…… Hahaha!
Anyway, going off topic… for today’s look, I wanted to step out of my ‘OG’ colour palette and go for a POP of colour. So….here it is.. an ‘easy-to-do’ EYE makeup tutorial. Believe me, when I say its easy.. it easy :)
To find out how I achieved this look.. just keep scrolling down.
— — — — — — — — — — — — — — — — — — — — — — — — — — — — — — —
STEP 1: PRIME the lids.
STEP 2: CONCEAL the lids (using a concealer or foundation) — we’re going to neutralise the lid.
STEP 3: SET the lids with a powder.
— — — — — — — — — — — — — — — — — — — — — — — — — — — — — —
STEP 4: With a blender brush, combine the 2 shades (medium orange/red-tone), sweep this along the crease and blend outwards.
— — — — — — — — — — — — — — — — — — — — — — — — — — — — — —
STEP 5: Using 2 brushes, start with a pencil brush, combine the 2 dark-plum shades and place this within the outer third of the crease. Begin to create the ‘outer-V’ shape.
Then using a blending brush, swipe the 2 pigments slightly within the inner crease. Concentrate the dark plum shades on the outer-third of the lid.
— — — — — — — — — — — — — — — — — — — — — — — — — — — — — — —
STEP 6: Using a pencil brush, pat this on the ‘outer-V’ and slightly within the outer third of the lid.
Using a blender brush, lightly blend and diffuse the black shade within the inner third of the crease.
— — — — — — — — — — — — — — — — — — — — — — — — — — — — — —
STEP 7: Tracing and overdrawing our Inner crease, using a flat eye brush and begin to pat this over the lid.
Blend this cream eyeshadow so it blends with the black eyeshadow.
— — — — — — — — — — — — — — — — — — — — — — — — — — — — — — —
STEP 8: To set out cream pigment to ensure it stays in place, we are going to place a loose blue-pigmented shadow over the entire blue-covered lid.
Use a small ‘natural-hair’ fibered brush. This will stay more on the lid and the brush.. not still stuck to the bottle.. haha!
— — — — — — — — — — — — — — — — — — — — — — — — — — — — — —
STEP 9: Coat your lashes with your favourite mascara. The more voluminous and fuller the product, the better!
STEP 10: Find some beautiful fluttery lashes. A 3D-styled lash. Just gives the eye that ‘FAB’ look.
— — — — — — — — — — — — — — — — — — — — — — — — — — — — — — —
STEP 11: With a black pencil liner, line your bottom waterline.
STEP 12: Using the black eyeshadow, swipe this along the bottom lash line.
STEP 13: Going back to the 2 dark-plum eyeshadows, swipe and blend these pigments into the existing black liner.
— — — — — — — — — — — — — — — — — — — — — — — — — — — — — — —
STEP 14: Ending with our 1st two pigments, blend and diffuse this shade into the previous shades along the bottom lash line.
— — — — — — — — — — — — — — — — — — — — — — — — — — — — — —
STEP 15: Using a small precise brush, place this loose pigment within the inner tear duct and bottom lash line.
STEP 16: COAT YOUR BOTTOM LASHES
STEP 17: SELFIE TIME!
Thank you so much for checking out my latest tutorial.
To catch up with my latest pic’s and posts, then head over to my other social media platforms:
FACEBOOK: www.facebook.com/nikkicross95
INSTAGRAM: nikki.c.photography
If you have any questions or want to know ‘HOW TO’.. shoot me over a message on my Insta or Facey :)
Until next time, have a good one!
❤ ❤ ❤
